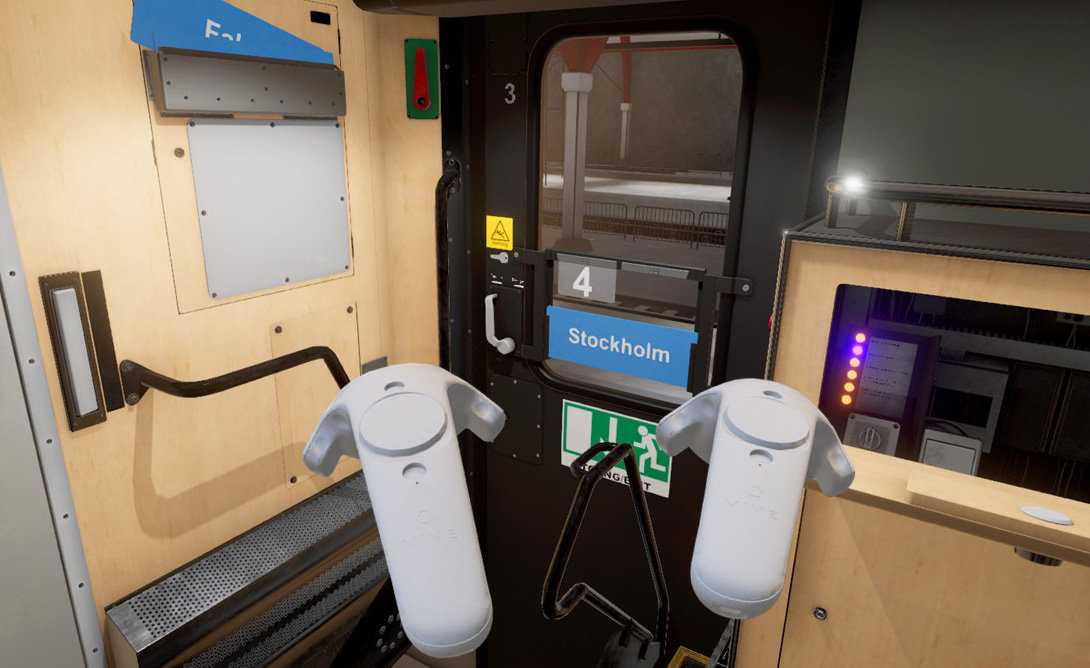
Python och GPS-spårning

Detta är en artikel från SparkFun, December 17, 2012

Introduction

In my quest to design a radio tracking system for my next HAB, I found it very easy to create applications on my computer and interact with embedded hardware over a serial port using the Python programming language. My goal was to have my HAB transmit GPS data (as well as other sensor data) over RF, to a base station, and graphically display position and altitude on a map. My base station is a radio receiver connected to my laptop over a serial to USB connection. However, in this tutorial, instead of using radios, we will use a GPS tethered to your computer over USB, as a proof of concept.

Of course, with an internet connection, I could easily load my waypoints into many different online tools to view my position on a map, but I didn’t want to rely on internet coverage. I wanted the position of the balloon plotted on my own map, so that I could actively track, without the need for internet or paper maps. The program can also be used as a general purpose NMEA parser, that will plot positions on a map of your choice. Just enter your NMEA data into a text file and the program will do the rest.
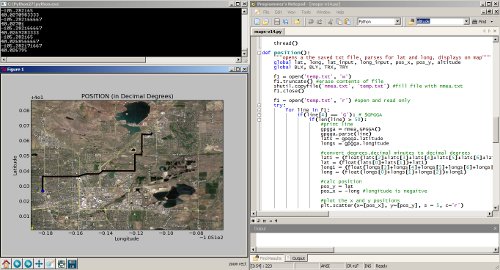
Showing a trip from SparkFun to Boulder, CO. 

This tutorial will start with a general introduction to Python and Python programming. Once you can run a simple Python script, we move to an example that shows you how to perform a serial loop back test, by creating a stripped down serial terminal program. The loopback test demonstrates how to send and receive serial data through Python, which is the first step to interacting with all kinds of embedded hardware over the serial port. We will finish with a real-world example that takes GPS data over the serial port and plots position overlaid on a scaled map of your choice. If you want to follow along with everything in this tutorial, there are a few pieces of hardware you will need.

For the loopback test, all you need is the FTDI Basic. For the GPS tracking example, you will need a GPS unit, as well as the FTDI. 

What is Python?

If you are already familiar with installing and running Python, feel free to skip ahead. Python is an interpreted programming language, which is slightly different than something like Arduino or programming in C. The program you write isn’t compiled as a whole, into machine code, rather each line of the program is sequentially fed into something called a Python interpreter. Once you get the Python interpreter installed, you can write scripts using any text editor. Your program is run by simply calling your Python script and, line by line, your code is fed into the interpreter. If your code has a mistake, the interpreter will stop at that line and give you an error code, along with the line number of the error.

The holy grail for Python 2.7 reference can be found here:

Installing Python

At the time of this tutorial, Python 2.7 is the most widely used version of Python and has the most compatible libraries (aka modules). Python 3 is available, but I suggest sticking with 2.7, if you want the greatest compatibility. 

After you install Python, you should be able to open a command prompt within any directory and type ’python’. You should see the interpreter fire up.
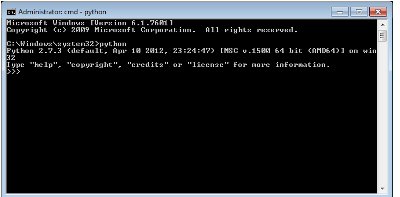
If you don’t see this, it is time to start some detective work. Copy your error code, enter it into your search engine along with the name ’python’ and your OS name, and then you should see a wealth of solutions to issues similar, if not exact, to yours. Very likely, if the command ’python’ is not found, you will need to edit your PATH variables. More information on this can be found here. FYI, be VERY careful editing PATH variables. If you don’t do it correctly, you can really mess up your computer, so follow the instructions exactly. You have been warned. 

If you don’t want to edit PATH variables, you can always run Python.exe directly out of your Python installation folder.

Running a Python Script 

Once you can invoke the Python interpreter, you can now run a simple test script. Now is a good time to choose a text editor, preferably one that knows you are writing Python code. In Windows, I suggest Programmers Notepad, and in Mac/Linux I use gedit. One of the main rules you need to follow when writing Python code is that code chunks are not enclosed by brackets {}, like they are in C programming. Instead, Python uses tabs to separate code blocks, specifically 4 space tabs. If you don’t use 4 space tabs or don’t use an editor that tabs correctly, you could get errant formatting, the interpreter will throw errors, and you will no doubt have a bad time. 

For example, here is a simple script that will print ’test’ continuously. 

# simple script
def test():
    print "test"
while 1:
    test()

Now save this code in a text editor with the extention your_script_name.py.

The first line is a comment (text that isn’t executed) and can be created by using a # .

The second line is a function definition named test().

The third line is spaced 4 times and is the function body, which just prints ”test” to the command window.

The third line is where the code starts in a while loop, running the test() function.

To run this script, copy and paste the code into a file and save it with the extention .py. Now open a command line in the directory of your script and type:

python your_script_name.py

The window should see the word ’test’ screaming by.

To stop the program, hit Ctrl+c or close the window. 

Installing a Python Module

At some point in your development, you will want to use a library or module that someone else has written. There is a simple process of installing Python modules. The first one we want to install is pyserial.

Download the tar.gz file and un-compress it to an accessible location. Open a command prompt in the location of the pyserial directory and send the command (use sudo if using linux):

python setup.py install

You should see a bunch of action in the command window and hopefully no errors. All this process is doing is moving some files into your main Python installation location, so that when you call the module in your script, Python knows where to find it. You can actually delete the module folder and tar.gz file when you are done, since the relevant source code was just copied to a location in your main Python directory. More information on how this works can be found here:

FYI, many Python modules can be found in Windows .exe installation packages that allow you to forgo the above steps for a ’one-click’ installation. A good resource for Windows binary files for 32-bit and 64-bit OS can be found here:

Python Serial Loopback Test

This example requires using an FTDI Basic or any other serial COM port device.
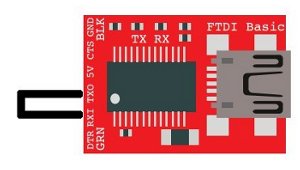
Simply, connect the TX pin to the RX pin with a wire to form a loopback. Anything that gets sent out of the serial port transmit pin gets bounced back to the receive pin. This test proves your serial device works and that you can send and receive data.  

Now, plug your FTDI Basic into your computer and find your COM port number. We can see a list of available ports by typing this:

python -m serial.tools.list_ports

If you are using linux:

dmesg | grep tty

Note your COM port number. 

Now download the piece of code below and open it in a text editor (make sure everything is tabbed in 4 space intervals!!):

import serial

#####Global Variables######################################
#be sure to declare the variable as 'global var' in the fxn
ser = 0

#####FUNCTIONS#############################################
#initialize serial connection 
def init_serial():
    COMNUM = 9 #set you COM port # here
    global ser #must be declared in each fxn used
    ser = serial.Serial()
    ser.baudrate = 9600
    ser.port = COMNUM - 1 #starts at 0, so subtract 1
    #ser.port = '/dev/ttyUSB0' #uncomment for linux

    #you must specify a timeout (in seconds) so that the
    # serial port doesn't hang
    ser.timeout = 1
    ser.open() #open the serial port

    # print port open or closed
    if ser.isOpen():
        print 'Open: ' + ser.portstr
#####SETUP################################################
#this is a good spot to run your initializations 
init_serial()

#####MAIN LOOP############################################
while 1:
    #prints what is sent in on the serial port
    temp = raw_input('Type what you want to send, hit enter:\n\r')
    ser.write(temp) #write to the serial port
    bytes = ser.readline() #reads in bytes followed by a newline 
    print 'You sent: ' + bytes #print to the console
    break #jump out of loop 
#hit ctr-c to close python window

First thing you need to do before running this code is to change the COM port number to the one that is attached to your FTDI. The COMNUM variable in the first few lines is where you enter your COM port number. If you are running linux, read the comments above for ser.port.

Now, if you want to send data over the serial port, use: 

ser.write(your_data)

your_data can be one byte or multiple bytes.

If you want to receive data over the serial port, use:

your_data = ser.readline() 

The readline() function will read in a series of bytes terminated with a new line character (i.e. typing something then hitting enter on your keyboard). This works great with GPS, because each GPS NMEA sentence is terminated with a newline. For more information on how to use pyserial, look here.

You might realize that there are three communication channels being used:

  1. ser.write – writes or transmitts data out of the serial port
  2. ser.read – reads or receives data from the serial port
  3. print – prints to the console window

Just be aware that ’print’ does not mean print out to the serial port, it prints to the console window. 

Notice, we don’t define the type of variables (i.e. int i = 0). This is because Python treats all variables like strings, which makes parsing text/data very easy. If you need to make calculations, you will need to type cast your variables as floats. An example of this is in the GPS tracking section below.

Now try to run the script by typing (remember you need to be working out of the directory of the pythonGPS.py file):

python pythonGPS.py
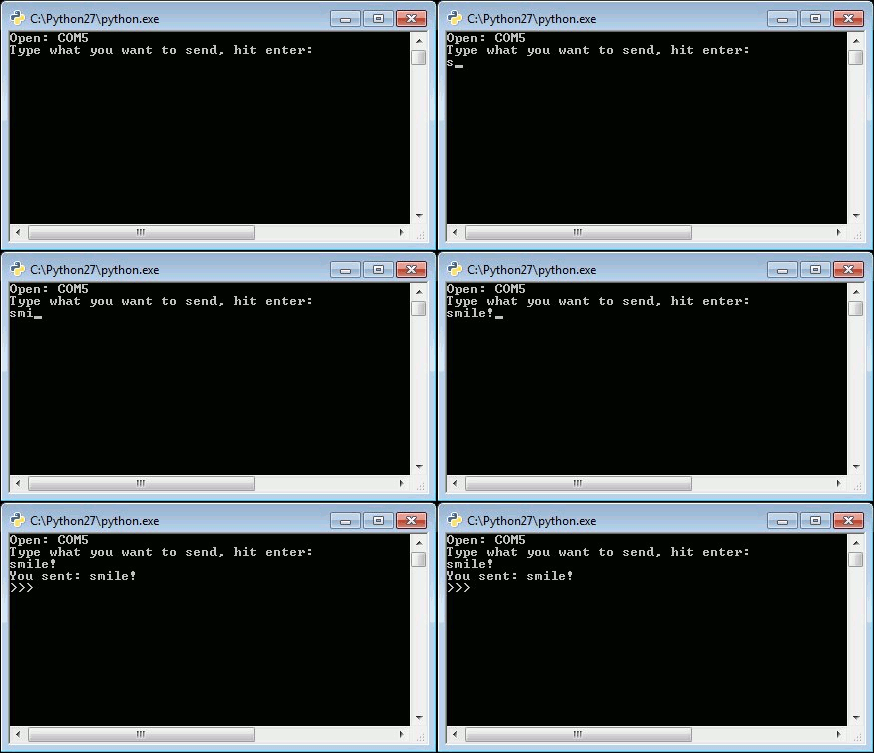
This script will open a port and display the port number, then wait for you to enter a string followed by the enter key. If the loopback was successful, you should see what you sent and the program should end with a Python prompt >>>. 

To close the window after successfully running, hit Ctrl + c.

Congratulations! You have just made yourself a very simple serial terminal program that can transmit and receive data!

Read a GPS and plot position with Python

Now that we know how to run a python script and open a serial port, there are many things you can do to create computer applications that communicate with embedded hardware. In this example, I am going to show you a program that reads GPS data over a serial port, saves the data to a txt file; then the data is read from the txt file, parsed, and plotted on a map. 

There are a few steps that need to be followed in order for this program to work.Install the modules in the order below.

Install modules

Use the same module installation process as above or find an executable package. 

The above process worked for me on my W7 machine, but I had to do some extra steps to get it to work on Ubuntu. Same might be said about Macs. With Ubuntu, you will need to completely clean your system of numpy, then build the source for numpy and matplotlib separately, so that you don’t mess up all of the dependencies. Here is the process I used for Ubuntu.

Once you have all of these modules installed without errors, you can download my project from github and run the program with a pre-loaded map and GPS NMEA data to see how it works:

Or you can proceed and create your own map and GPS NMEA data.

Select a map

Any map image will work, all you need to know are the bottom left and top right coordinates of the image. The map I used was a screen shot from Google Earth. I set placemarks at each corner and noted the latitude and longitude of each corner. Be sure to use decimal degrees coordinates.
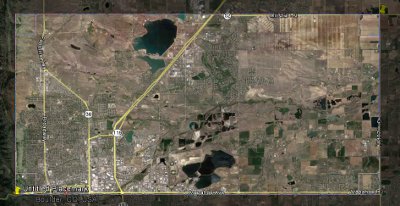
Then I cropped the image around the two points using gimp. The more accurate you crop the image the more accurate your tracking will be. Save the image as ’map.png’ and keep it to the side for now.

Hardware Setup

The hardware for this example includes a FTDI Basic and any NMEA capable GPS unit.

EM-406 GPS connected to a FTDI Basic

For the connections, all you need to do is power the GPS with the FTDI basic (3.3V or 5V and GND), then connect the TX pin of the GPS to the RX pin on the FTDI Basic.

It is probably best to allow the GPS to get a lock by leaving it powered for a few minutes before running the program. If the GPS doesn’t have a lock when you run the program, the maps will not be generated and you will see the raw NMEA data streaming in the console window. If you don’t have a GPS connected and you try to run the program, you will get out-of-bound errors from the parsing. You can verify your GPS is working correctly by opening a serial terminal program.  

Run the program

Here is the main GPS tracking program file:

Save the python script into a folder and drop your map.png file along side maps.py. Here is what your program directory should look like if you have a GPS connected:

The nmea.txt file will automatically be created if you have your GPS connected. If you don’t have a GPS connected and you already have NMEA sentences to be displayed, create a file called ’nmea.txt’ and drop the data into the file.

Now open maps.py, we will need to edit some variables, so that your map image will scale correctly. 

Edit these variables specific to the top right and bottom left corners of your map. Don’t forget to use decimal degree units!

#adjust these values based on your location and map, lat and long are in decimal degrees
TRX = -105.1621     #top right longitude
TRY = 40.0868       #top right latitude
BLX = -105.2898     #bottom left longitude
BLY = 40.0010       #bottom left latitude

Run the program by typing:

python gpsmap.py

The program starts by getting some information from the user.
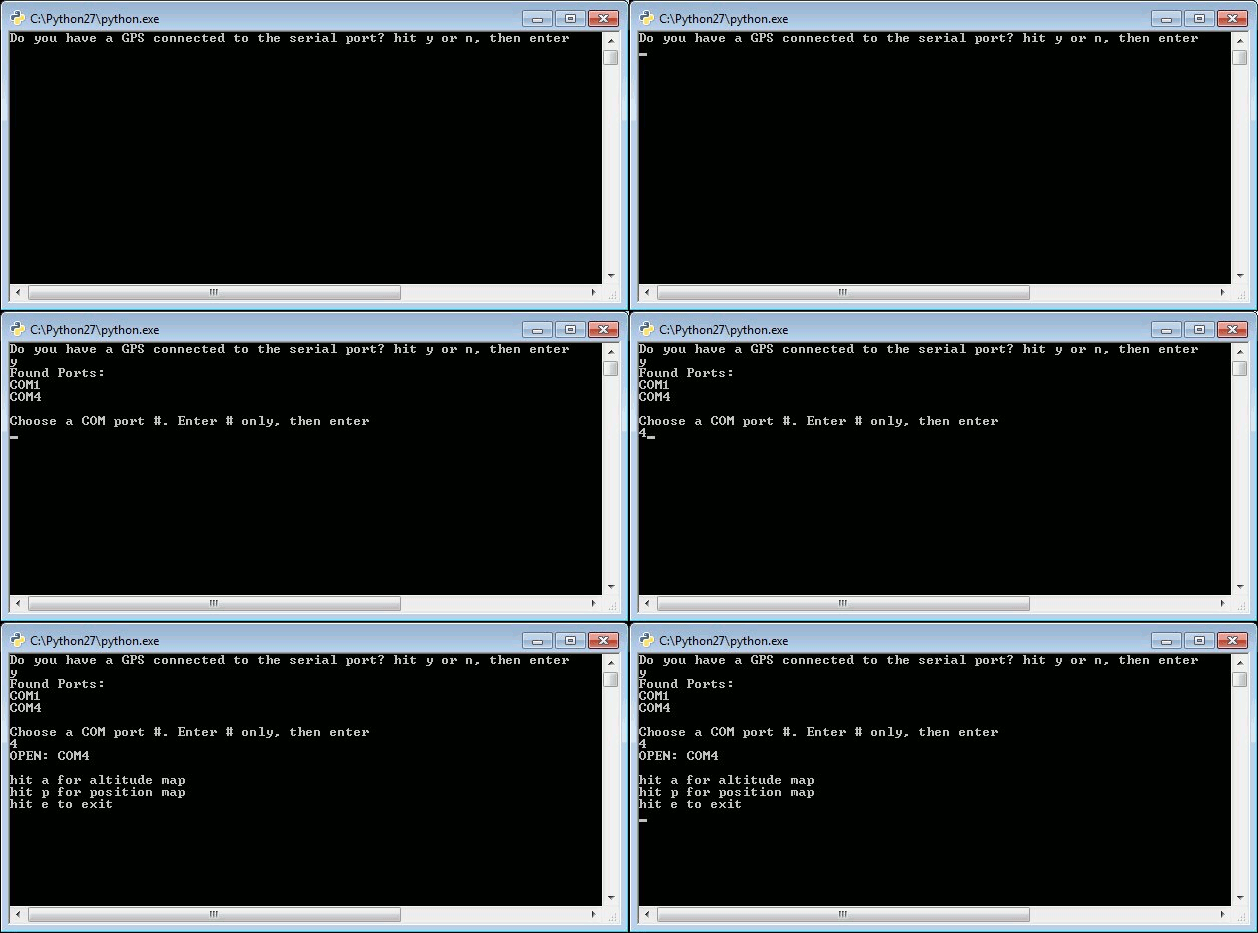
You will select to either run the program with a GPS device connected or you can load your own GPS NMEA sentences into a file called nmea.txt. Since you have your GPS connected, you will select your COM port and be presented with two mapping options: a position map…
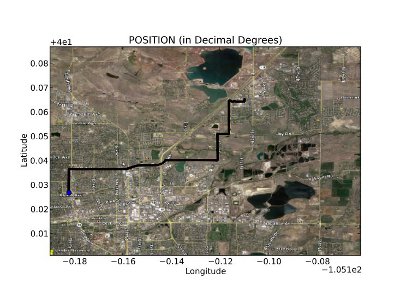
…or an altitude map.
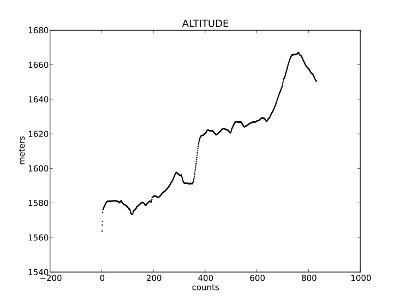
Once you open the serial port to your GPS, the nmea.txt file will automatically be created and raw GPS NMEA data, specifically GPGGA sentences, will be logged in a private thread. When you make a map selection, the nmea.txt file is copied into a file called temp.txt, which is parsed for latitude and longitude (or altitude). The temp.txt file is created to parse the data so that we don’t corrupt or happen to change the main nmea.txt log file. 

The maps are generated in their own windows with options to save, zoom, and hover your mouse over points to get fine grain x,y coordinates. 

Also, the maps don’t refresh automatically, so as your GPS logs data, you will need to close the map window and run the map generation commands to get new data. If you close the entire Python program, the logging to nmea.txt halts. 

This program isn’t finished by any means. I found myself constantly wanting to add features and fix bugs. I binged on Python for a weekend, simply because there are so many modules to work with: GUI tools, interfacing to the web, etc. It is seriously addicting. If you have any modifications or suggestions, please feel free to leave them in the comments below. Thanks for reading!

Hål i solceller förvandlar dem till transparenta fönster

transparent solar cell

Stansning av hål i opaka solceller förvandlar dem till transparenta fönster.
Bild från Ulsan National Institute of Science and Technology (UNIST)

Dina kontorfönster kan snart ersättas med solpaneler, eftersom forskare har hittat ett enkelt sätt att göra den gröna tekniken transparent. Tricket är att stansa små hål i dem som är så nära varandra att vi ser dem som tydliga.

Solpaneler kommer att vara avgörande för att öka upptaget av solenergi i städer, säger Kwanyong Seo vid Ulsan National Institute of Science and Technology, Sydkorea.

Det beror på att takutrymmet förblir relativt fast medan fönsterutrymmet växer när byggnader blir högre. ”Om vi ​​applicerar transparenta solceller på fönster i byggnader kan de generera enorma mängder elkraft varje dag,” säger Seo.

Problemet med de senaste utvecklade transparenta solcellerna är att de ofta är mindre effektiva. De tenderar också att ge ljuset som passerar genom dem en röd eller blå nyans.

För att övervinna detta söker många forskare efter nya material att bygga transparenta solceller med. Seo och hans kollegor ville dock utveckla transparenta solceller från det mest använda materialet, kristallina kiselskivor, som finns i cirka 90 procent av solcellerna över hela världen.

De tog 1 centimeter kvadratceller gjorda av kristallint kisel, som är helt ogenomskinligt, och sedan stansade små hål i dem för att släppa igenom ljuset.

Hålen är 100 mikrometer i diameter, omkring storleken på ett mänskligt hår, och de släpper igenom 100 procent av ljuset utan att ändra färg.

Den fasta delen av cellen absorberar fortfarande allt ljus som träffar den, vilket resulterar i en hög effektomvandlingseffektivitet på 12 procent. Detta är väsentligt bättre än de 3 till 4 procent som andra transparenta celler har uppnått, men är fortfarande lägre än 20 procent effektiviteten som de bästa helt ogenomskinliga cellerna som för närvarande finns på marknaden.

Under de kommande åren hoppas Seo och hans kollegor att utveckla en solcell som har en effektivitet på minst 15 procent. För att kunna sälja dem på marknaden måste de också utveckla en elektrod som är transparent.

Journalreferens: Joule, DOI: 10.1016 / j.joule.2019.11.008

Läs mer: https://www.newscientist.com/article/2226881-punching-holes-in-solar-cells-turns-them-into-transparent-windows/#ixzz67zpgKIl2

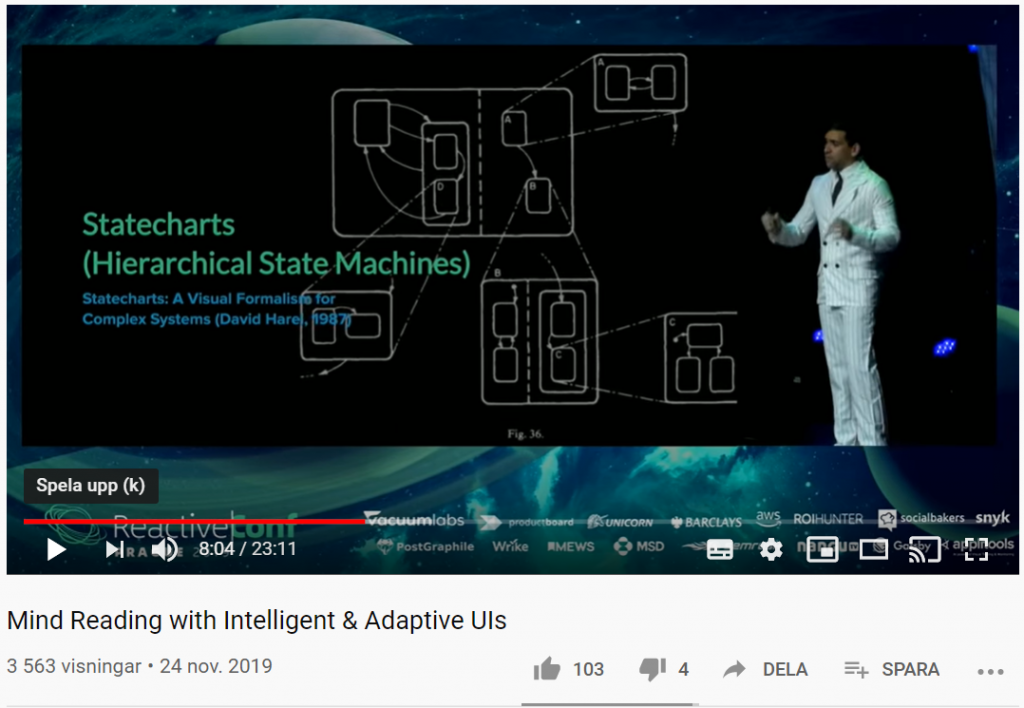
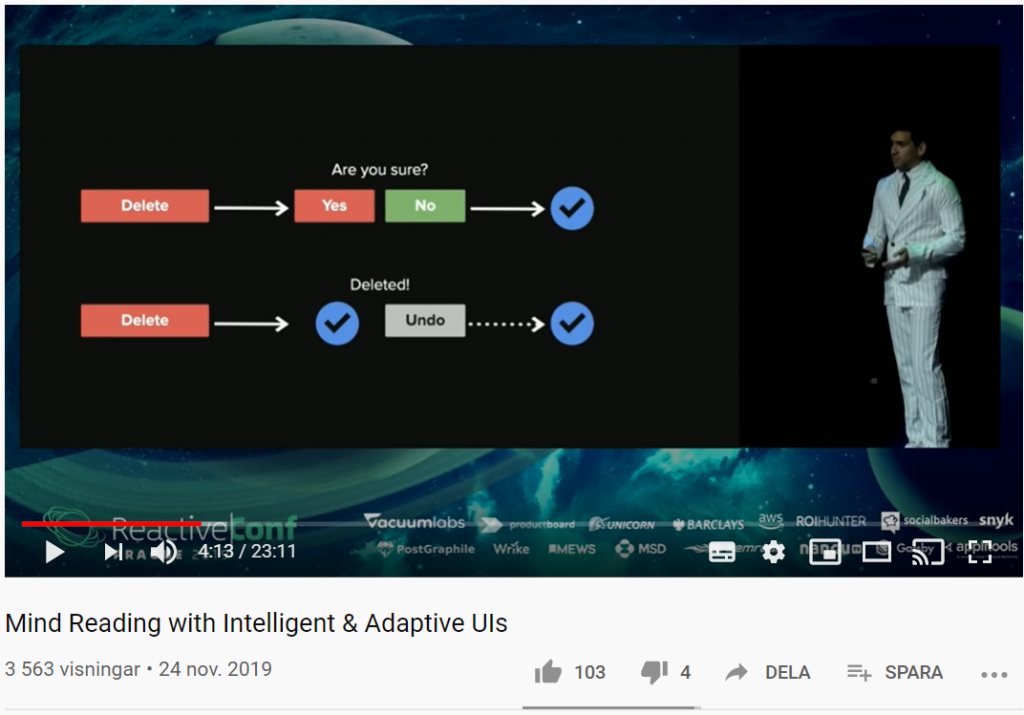
Designa adaptiva intelligenta användargränssnitt

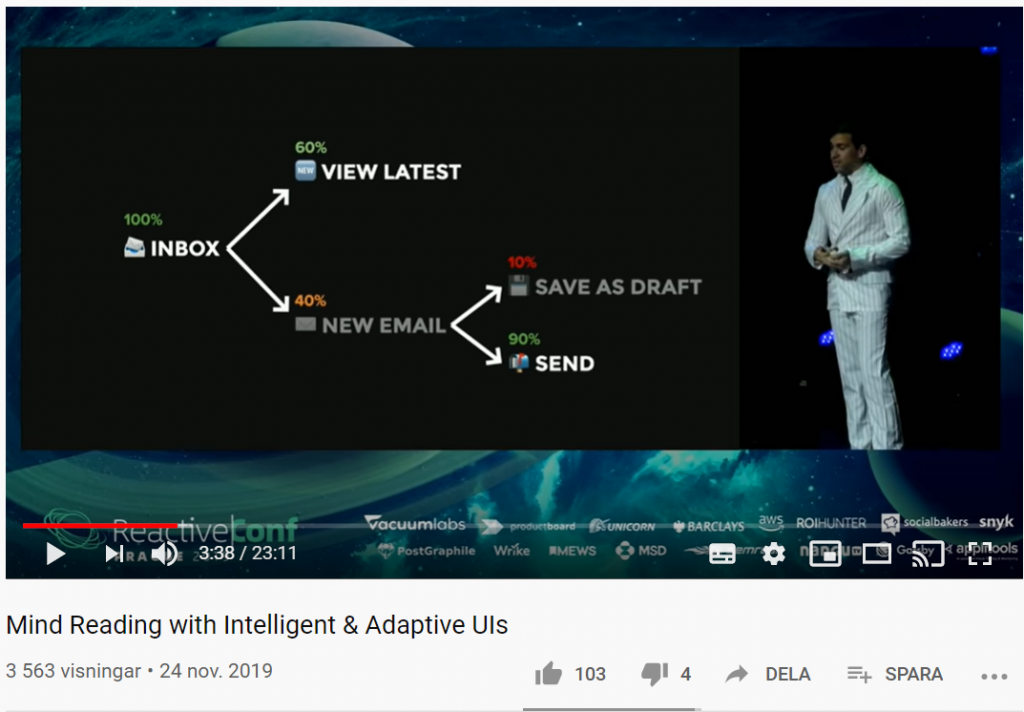
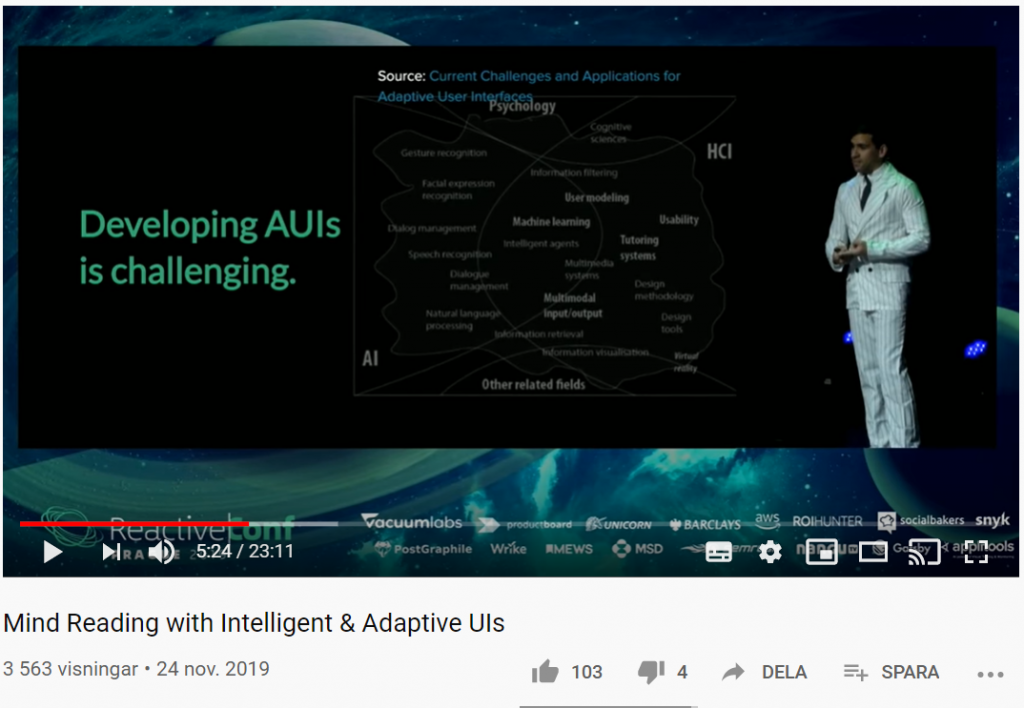
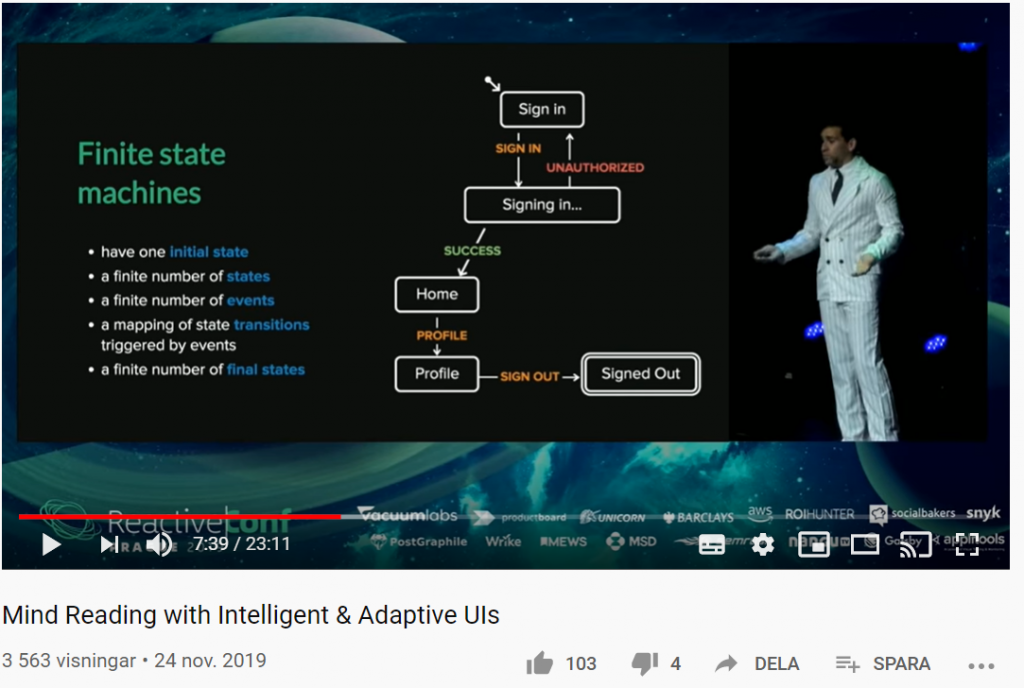
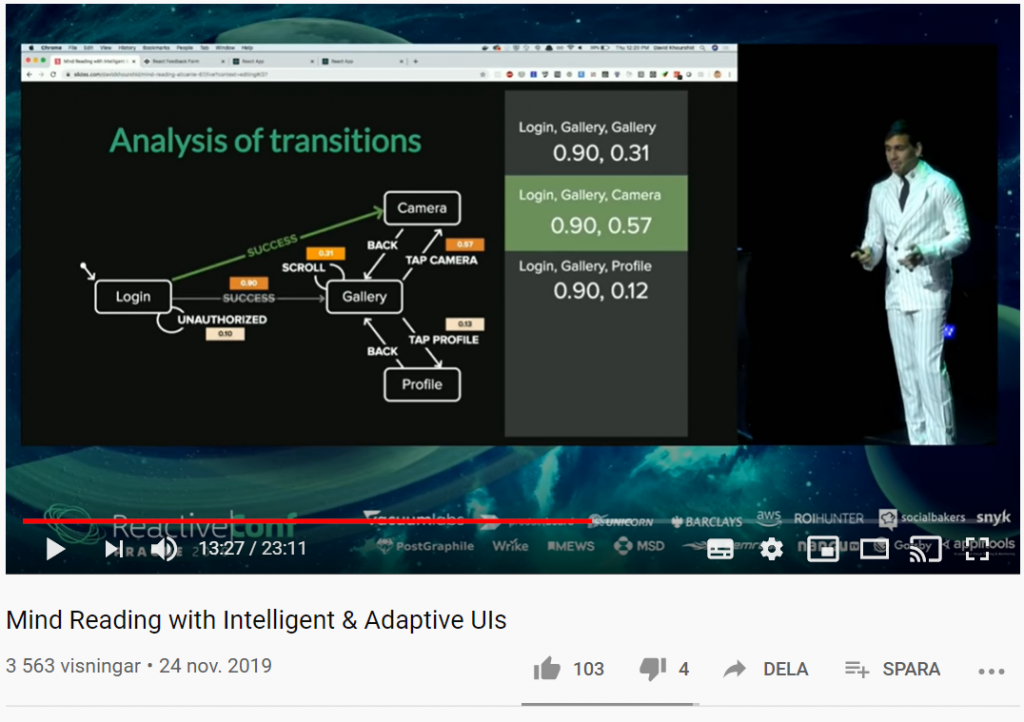
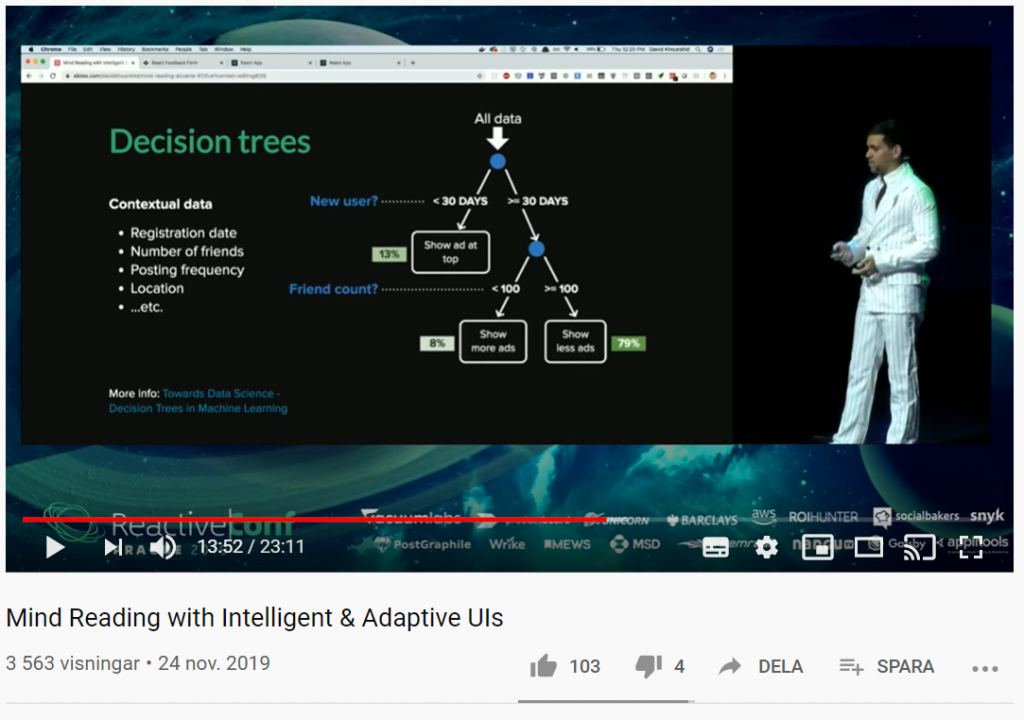
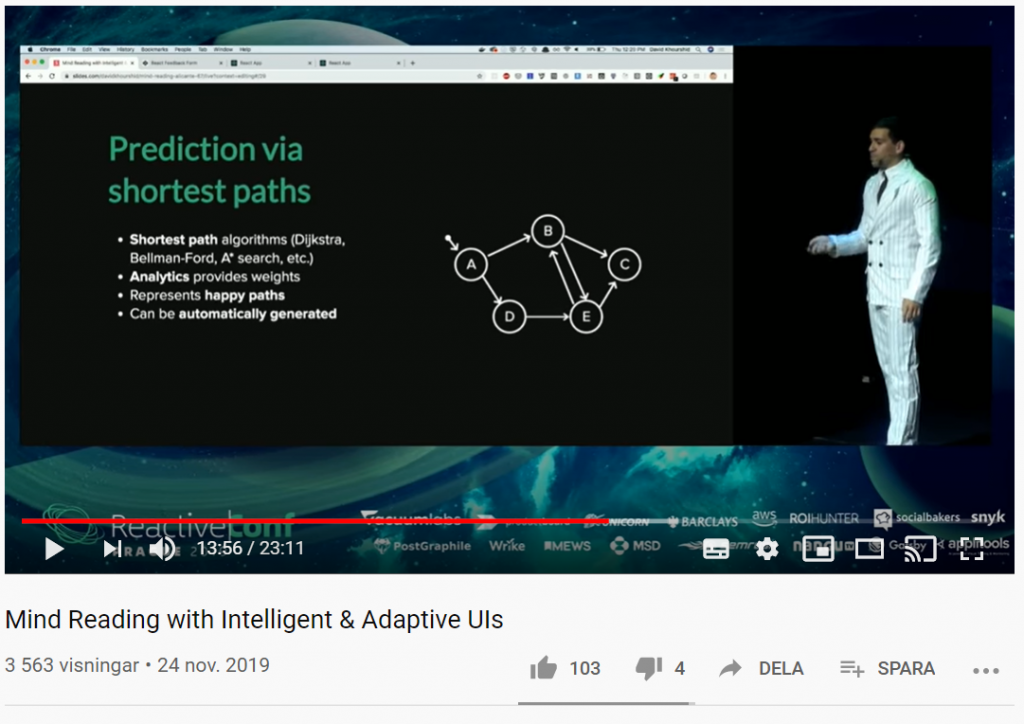
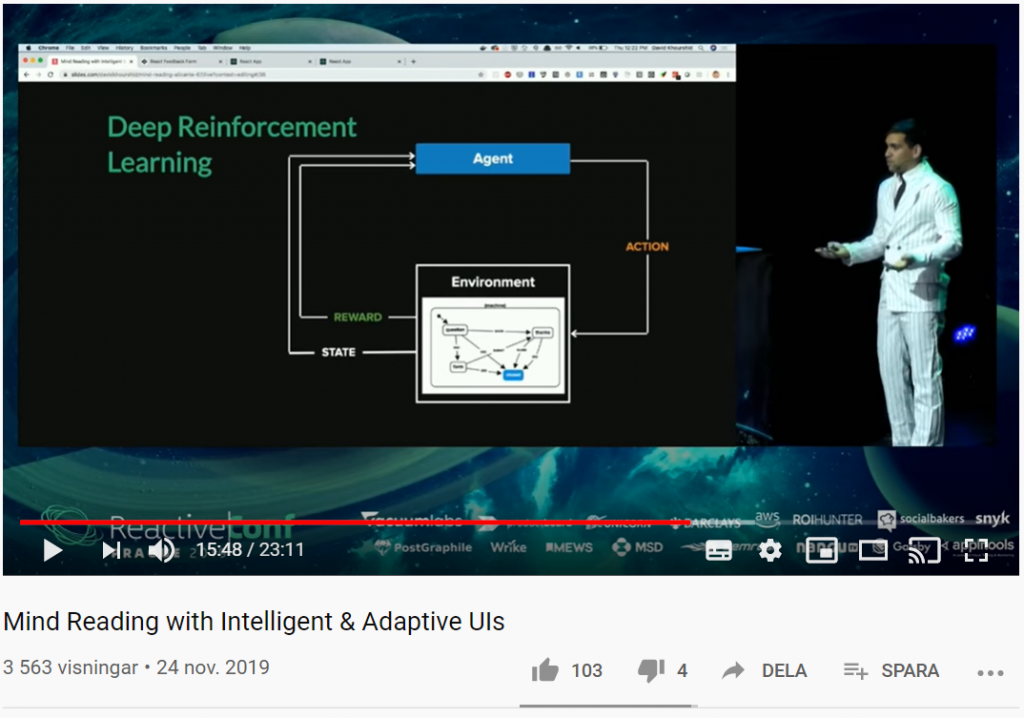
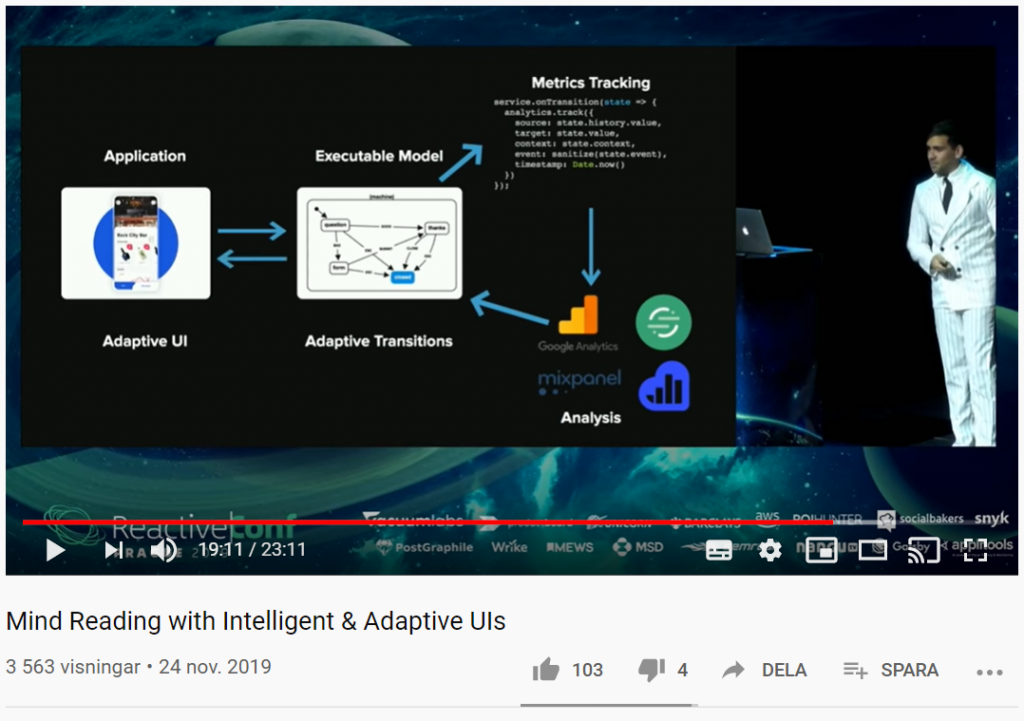
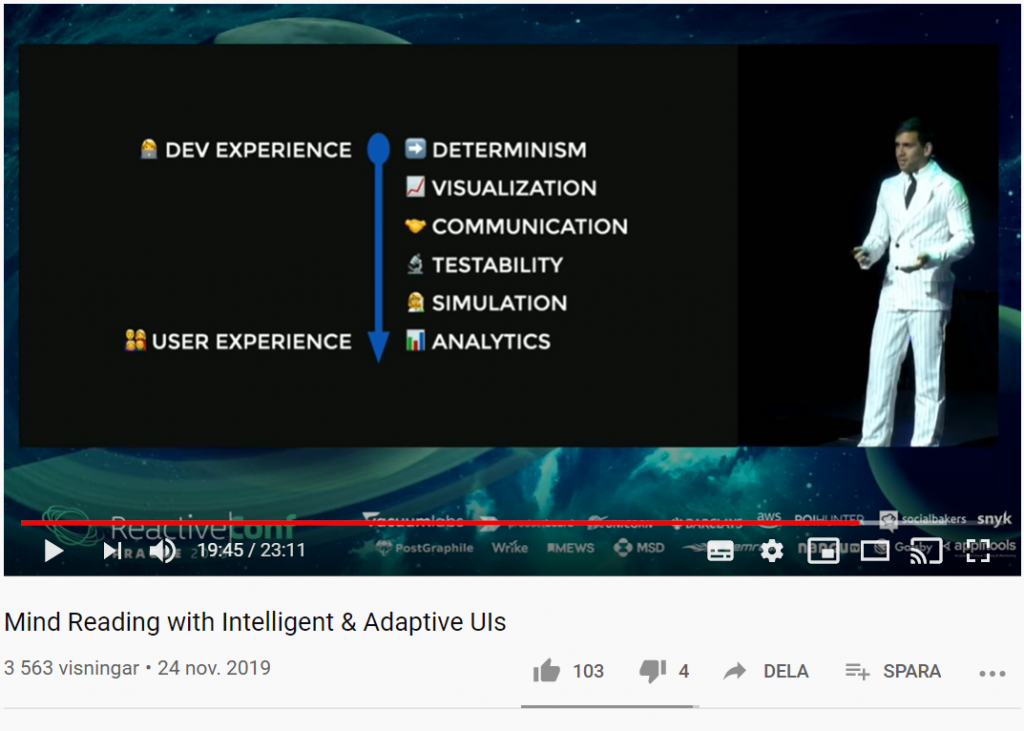
Vad händer om du kan förutsäga användarnas beteende med smarta användargränssnitt? Med sannolikhetsstyrda statecharts, beslutsträd (decision trees), förstärkt inlärning (reinforcement learning) och mer, kan UI:s (User Interfaces) utvecklas på ett sådant sätt att de automatiskt anpassar sig till användarens beteende.

I filmklippet nedan kommer du få se hur du kan skapa anpassningsbara och intelligenta användargränssnitt som lär sig hur individuella användare använder dina appar och anpassar gränssnittet och funktionerna just för dem i realtid.

Mind Reading with Intelligent & Adaptive UIs (23:11)

Model driven development

Mäta CO2 och VOC med ESP32

Känner du dig ibland trött under möten eller i skolan?
Har du ibland huvudvärk efter jobbet eller skolan?
Vill du ändra på det? Då kan det vara intressant för dig att mäta skadliga gaser i luften i din arbetsmiljö, vilka kan resultera i både trötthet och huvudvärk.

I filmklippet nedan används en ESP32 och två ESP8266 med sensorer för att bygga ett system som mäter luftkvaliteten. Sensorerna som används är: Winsen MH-Z19, Sensirion SGP30 och SCD30.
I denna video:

  • Fokusera på inomhusklimat
  • Fokusera på gaser där den främsta källan är människor
  • CO2:s påverkan på luftkvaliteten inomhus
  • Se förhållandet mellan CO2-sensorer och global uppvärmning
  • Använd ett annat sätt för att bedöma inomhusluften: VOC eller eCO2
  • Och vi kommer att bygga sensorer för att överföra värden till Grafana

How to measure CO2 and VOC with ESP Microprocessors. Which one is better? (21:12)


Principer för hållbar design

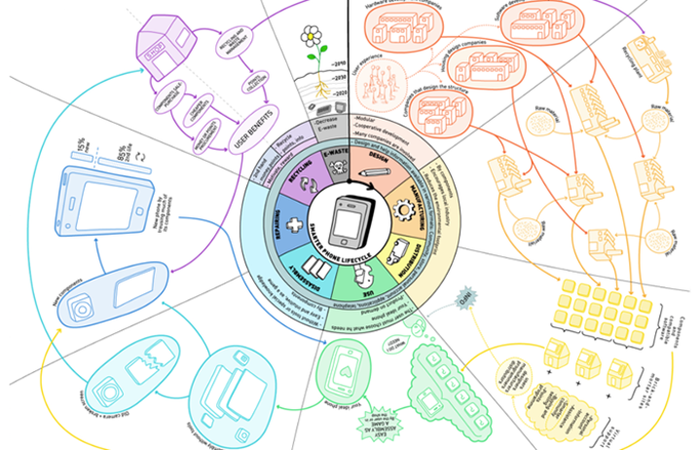
Principerna för hållbar design är integrerade i alla stadier i design- och byggprocessen och kan driva innovation, samtidigt som naturresurserna bevaras.

Denna kurs innehåller videoföreläsningar, designutmaningar, programvaruhandledning för Fusion 360 och en rad hållbara designdokument och exempel från ledande experter inom området. Under denna kurs kommer du att använda programvaran Fusion 360 CAD / CAM för att designa, utveckla, prototypa och testa hållbar innovation genom en serie 3-timmars utmaningsuppdrag.

Genom att använda detta strukturerade tillvägagångssätt kan du lära dig att stänga av dina förutfattade meningar och se saker på ett nytt sätt. Oavsett om du vill förbättra en befintlig lösning eller ta itu med en hållbar utmaning för första gången, förbereder denna kurs produktdesigners och ingenjörer att ta ett snabbt steg framåt för att integrera principerna för hållbarhet i deras designprocess.

The Principles of Sustainable Design


The principles of sustainable design are integral to all stages of the design and build process and can drive innovation, while also preserving natural resources.

This course includes video lectures, design challenges, Fusion 360 software tutorials, and a range of sustainable design documents and examples from leading experts in the field. During this course, you’ll use Fusion 360 CAD/CAM software to design, develop, prototype, and test sustainable innovation through a series of 3-hour challenge assignments.

Working through this structured approach, you can learn how to suspend your judgment and look at things in a new way. Whether you are looking to improve an existing solution or address a sustainable challenge for the first time, this course prepares product designers and engineers to take a quick step forward to integrating the principles of sustainability into their design process.

Project resource download

Getting started
In this lesson, we’ll discover what you’ll learn in this course and download the software and resources you need.

Instructor guidePrinciples of Sustainable Design – Instructor guide

Lesson 1: Introduction to sustainable design
This lesson introduces you to case studies of good practice models.

Lesson 2: Extending product lifetimes
This lesson introduces you to good practice models for improving product lifetimes.

Lesson 3: Green materials
This lesson provides you with lectures, videos, case studies, and good practice models for green materials selection.

Lesson 4: Reducing energy loss
This lesson introduces you to case studies and good practice models for energy-efficient design, including fluid dynamics, optimizing heat transfer, and reducing friction.

Lesson 5: Lightweighting
This lesson introduces you to case studies and good practice models for lightweighting in design.

Lesson 6: Persuasive design
This lesson introduces you to case studies and good practice models for persuasive design.

Lesson 7: Biomimicry
This lesson introduces you to case studies and good practice models for biomimicry.

Appendix: Getting started with Fusion 360
This lesson introduces you to case studies and good practice models when using CAD/CAM in the design development process.

The values and principles of the Agile Manifesto

The Four Values of The Agile Manifesto

The Agile Manifesto is comprised of four foundational values and 12 supporting principles which lead the Agile approach to software development. Each Agile methodology applies the four values in different ways, but all of them rely on them to guide the development and delivery of high-quality, working software.

1. Individuals and Interactions Over Processes and Tools
The first value in the Agile Manifesto is “Individuals and interactions over processes and tools.” Valuing people more highly than processes or tools is easy to understand because it is the people who respond to business needs and drive the development process. If the process or the tools drive development, the team is less responsive to change and less likely to meet customer needs. Communication is an example of the difference between valuing individuals versus process. In the case of individuals, communication is fluid and happens when a need arises. In the case of process, communication is scheduled and requires specific content.

2. Working Software Over Comprehensive Documentation
Historically, enormous amounts of time were spent on documenting the product for development and ultimate delivery. Technical specifications, technical requirements, technical prospectus, interface design documents, test plans, documentation plans, and approvals required for each. The list was extensive and was a cause for the long delays in development. Agile does not eliminate documentation, but it streamlines it in a form that gives the developer what is needed to do the work without getting bogged down in minutiae. Agile documents requirements as user stories, which are sufficient for a software developer to begin the task of building a new function.
The Agile Manifesto values documentation, but it values working software more.

3. Customer Collaboration Over Contract Negotiation
Negotiation is the period when the customer and the product manager work out the details of a delivery, with points along the way where the details may be renegotiated. Collaboration is a different creature entirely. With development models such as Waterfall, customers negotiate the requirements for the product, often in great detail, prior to any work starting. This meant the customer was involved in the process of development before development began and after it was completed, but not during the process. The Agile Manifesto describes a customer who is engaged and collaborates throughout the development process, making. This makes it far easier for development to meet their needs of the customer. Agile methods may include the customer at intervals for periodic demos, but a project could just as easily have an end-user as a daily part of the team and attending all meetings, ensuring the product meets the business needs of the customer.

4. Responding to Change Over Following a Plan
Traditional software development regarded change as an expense, so it was to be avoided. The intention was to develop detailed, elaborate plans, with a defined set of features and with everything, generally, having as high a priority as everything else, and with a large number of many dependencies on delivering in a certain order so that the team can work on the next piece of the puzzle.

With Agile, the shortness of an iteration means priorities can be shifted from iteration to iteration and new features can be added into the next iteration. Agile’s view is that changes always improve a project; changes provide additional value.

Perhaps nothing illustrates Agile’s positive approach to change better than the concept of Method Tailoring, defined in An Agile Information Systems Development Method in use as: “A process or capability in which human agents determine a system development approach for a specific project situation through responsive changes in, and dynamic interplays between contexts, intentions, and method fragments.” Agile methodologies allow the Agile team to modify the process and make it fit the team rather than the other way around.

The Twelve Agile Manifesto Principles

The Twelve Principles are the guiding principles for the methodologies that are included under the title “The Agile Movement.” They describe a culture in which change is welcome, and the customer is the focus of the work. They also demonstrate the movement’s intent as described by Alistair Cockburn, one of the signatories to the Agile Manifesto, which is to bring development into alignment with business needs.

The twelve principles of agile development include:

  1. Customer satisfaction through early and continuous software delivery – Customers are happier when they receive working software at regular intervals, rather than waiting extended periods of time between releases.
  2. Accommodate changing requirements throughout the development process – The ability to avoid delays when a requirement or feature request changes.
  3. Frequent delivery of working software – Scrum accommodates this principle since the team operates in software sprints or iterations that ensure regular delivery of working software.
  4. Collaboration between the business stakeholders and developers throughout the project – Better decisions are made when the business and technical team are aligned.
  5. Support, trust, and motivate the people involved – Motivated teams are more likely to deliver their best work than unhappy teams.
  6. Enable face-to-face interactions – Communication is more successful when development teams are co-located.
  7. Working software is the primary measure of progress – Delivering functional software to the customer is the ultimate factor that measures progress.
  8. Agile processes to support a consistent development pace –Teams establish a repeatable and maintainable speed at which they can deliver working software, and they repeat it with each release.
  9. Attention to technical detail and design enhances agility – The right skills and good design ensures the team can maintain the pace, constantly improve the product, and sustain change.
  10. Simplicity – Develop just enough to get the job done for right now.
  11. Self-organizing teams encourage great architectures, requirements, and designs – Skilled and motivated team members who have decision-making power, take ownership, communicate regularly with other team members, and share ideas that deliver quality products.
  12. Regular reflections on how to become more effective – Self-improvement, process improvement, advancing skills, and techniques help team members work more efficiently.

The intention of Agile is to align development with business needs, and the success of Agile is apparent. Agile projects are customer focused and encourage customer guidance and participation. As a result, Agile has grown to be an overarching view of software development throughout the software industry and an industry all by itself.


Kent Beck
Mike Beedle
Arie van Bennekum
Alistair Cockburn
Ward Cunningham
Martin Fowler
James Grenning
Jim Highsmith
Andrew Hunt
Ron Jeffries
Jon Kern
Brian Marick
Robert C. Martin
Steve Mellor
Ken Schwaber
Jeff Sutherland
Dave Thomas

© 2001, the above authors

Agil systemutveckling

Att bedriva utveckling med agila metoder innebär att man arbetar iterativt och inkrementellt med många små och snabba delleveranser i regelbundet korta intervaller.
Arbetssättet är flexibelt och betonar snabb­­het, in­formellt sam­arbete, täta kund­kontakter och möjlig­het att ändra under arbetets gång. (Se agil.) Även krav­specifikationen bör kunna revideras under projektets gång eftersom behov, önskemål och förutsättningar kan förändras över tid.
Det är mer att betrakta som en rörelse, inte en en­­hetlig metod.
Manifestet för agil system­­utveckling (länk) publicerades 2001 av en grupp pro­grammerare som hade reagerat på strävan efter detaljerade kravspecifikationer, omfattande dokumentation och byråkratiserande metoder och processer som var resultatet av den traditionella projektmodellen ”vattenfallsmetoden”. De bildade Agile Alliance (länk), och har sedan dess utvecklat verk­tyg och andra hjälp­medel.
Scrum och Kanban är två vanliga agila metoder som hjälper projektteam att prioritera, synliggöra arbete och framsteg och minska flaskhalsar i produktionen.
Klicka här för en artikel om Kanban.

Klicka här för en artikel som beskriver grunderna i Scrum.

Klicka här för att läsa ett blogginlägg om vad det innebär att arbeta agilt.

Agila manifestet består av följande fyra grundläggande värden och 12 stödjande principer som leder den agila strategin för mjukvaruutveckling. Varje agil metodik tillämpar de fyra värdena på olika sätt, men alla litar på dem för att vägleda utvecklingen och leveransen av högkvalitativ, fungerande programvara.

Vi finner bättre sätt att utveckla programvara genom att utveckla själva och hjälpa andra att utveckla. Genom detta arbete har vi kommit att värdesätta:

1. Individer och interaktioner framför processer och verktyg.
2. Fungerande programvara framför omfattande dokumentation.
3. Kundsamarbete framför kontraktsförhandling.
4. Anpassning till förändring framför att följa en plan.

Det vill säga, medan det finns värde i punkterna till höger, värdesätter vi punkterna till vänster mer.

Principerna bakom det agila manifestet

Vi följer dessa 12 principer:

  1. Vår högsta prioritet är att tillfredsställa beställarens önskemål genom tidig och kontinuerlig leverans av värdefull programvara.
  2. Välkomna förändrade krav, även sent under utvecklingen. Agila metoder utnyttjar förändring till kundens konkurrensfördel.
  3. Leverera fungerande programvara ofta, med ett par veckors till ett par månaders mellanrum, ju oftare desto bättre.
  4. Verksamhetskunniga och utvecklare måste arbeta tillsammans dagligen under hela projektet.
  5. Bygg projekt kring motiverade individer. Ge dem den miljö och det stöd de behöver, och lita på att de får jobbet gjort.
  6. Kommunikation ansikte mot ansikte är det bästa och effektivaste sättet att förmedla information, både till och inom utvecklingsteamet.
  7. Fungerande programvara är främsta måttet på framsteg.
  8. Agila metoder verkar för uthållighet. Sponsorer, utvecklare och användare skall kunna hålla jämn utvecklingstakt under obegränsad tid.
  9. Kontinuerlig uppmärksamhet på förstklassig teknik och bra design stärker anpassningsförmågan.
  10. Enkelhet – konsten att maximera mängden arbete som inte görs – är grundläggande.
  11. Bäst arkitektur, krav och design växer fram med självorganiserande team.
  12. Med jämna mellanrum reflekterar teamet över hur det kan bli mer effektivt och justerar sitt beteende därefter.

Läs gärna mer om manifestet med tydliga förklaringar av varje princip i denna artikel på engelska.

SJ satsar på VR och AR

SJ har sedan något år tillbaka en uttalad målsättning att bli ett av Sveriges mest digitaliserade bolag. Det låter kanske en smula klyschigt och är egentligen ganska ointressant.
Det som däremot är väldigt intressant och spännande är att se att SJ, till skillnad från väldigt många andra, faktiskt gör konkreta och vettiga digitaliseringssatsningar som skapar reellt värde, faktisk kundnytta samt leder till betydande besparingar och påtagliga effektiviseringar av verksamheten.

Några exempel:
Idag sker 97 % av SJ:s biljettförsäljning digitalt där kunderna bokar själva online. För bara 5 år sedan var den siffran 50 %.
50 % av alla bokningar sker via smartphones.
60 % av alla betalningar sker idag via Swish, som bara funnits som betalningsalternativ sedan 2017.
Alla ombokningar av resenärer vid inställda tåg eller kraftiga förseningar sker idag helt automatiskt och digitalt, vilket krävde väldigt mycket tid och resurser tidigare pga manuellt arbete av personal som oftast var underbemannade när det verkligen hände.

SJ använder sig av Design Thinking och låter sina kunder/resenärer vara delaktiga vid utvecklingen och utvärderingen av nya mobila tjänster som t ex VägvisARen som är en AR-guide för att hitta rätt på stationen m.m (se nedan).

VR i utbildningen av de anställda.

SJ utbildar sin personal med hjälp av virtuell verklighet (VR).
SJ utbildar sina anställda mha virtuell verklighet VR. Foto: Andreas Lundberg SJ/TT

SJ använder nu VR i utbildningen av sin personal eftersom de ser att det både ökar utbildningskvaliteten och effektiviserar utbildningsverksamheten, jämfört mot de traditionella lärarledda utbildningarna.
Denna digitala transformation inom SJ, och det förändrade användarbeteendet hos resenärerna mot att använda och föredra de digitala mobila tjänsterna, har gått väldigt snabbt.

SJ utbildar sin personal med hjälp av virtuell verklighet (VR).
Lokförare och tågvärdar hos SJ ska före årets slut ha utbildats med hjälp av virtuell verklighet (VR)

Över 2 500 lokförare och tågvärdar hos SJ ska före årets slut ha utbildats med hjälp av virtuell verklighet (VR). En fördel är att kunna träna på farliga moment, till exempel övningar som rör starkström.

VR-satsningen ingår i ett stort digitaliseringsprogram inom SJ. I september inleddes utbildningen som medger att personalen kan träna om och om igen och inte behöver resa till en viss ort för att skola sig.

Nu finns VR på 14 av SJ:s stationeringsorter. Utbildningarna är inspirerade av dataspelsvärlden och handkontroller används. De har även börjat testa eye tracking-teknik för att styra delar av upplevelsen med ögonen. När till exempel en dörr stängs på det virtuella tåget går det lite trögt precis som i verkligheten. Det karaktäristiska pyset när dörren öppnas ingår också.

– Den stora fördelen är att vi inte blir lika beroende av att använda fysiska tåg i utbildningen, säger affärsutvecklare Aron Wahlberg på SJ till TT.

Genom att kunna simulera säkerhetsprocesser och öva på olika scenarier på de flesta av SJ:s fordonstyper, hoppas den statliga tågoperatören nå ökad punktlighet, säkerhet och service.

Personalen VR-tränas i stressiga och svåra situationer som brand, dålig sikt och plötsliga distraktioner precis vid avgång. Ett annat exempel är hanteringen av rullstolslift som kräver elva olika steg och handgrepp.

– Reaktionerna har över lag varit väldigt positiva och personalen kommer med nya idéer om hur VR kan utnyttjas i utbildningen, säger Aron Wahlberg.

Demo av VR-utbildning i hantering av rullstolslift

Virtual Reality på nya X 2000

Utvecklingen av nya X 2000 har lämnat skisstadiet och nu börjar testandet av olika funktioner.
Premiärturen för det första nya X 2000 kommer att ske i slutet av 2019/början av 2020. Under år 2021 ska samtliga X 2000 ha fått ny inredning, nya stolar, ny bistro, nya digitala skärmar och nya tekniska system. För att testpersonerna ska kunna uppleva det nya tåget redan nu satsar de på VR.

 – Vi vill använda nya, spännande lösningar när vi utvecklar nya tjänster och produkter, säger Anna Fahlkrans, affärsutvecklare på SJ. Utvecklingen av nya X 2000 är en miljardsatsning och det är viktigt att kunder och personal på ett tidigt stadium kan ge synpunkter på det vi utvecklar. Senare i år kommer också all ny teknisk utrustning att testas. Därefter kommer designen av den nya bistrovagnen samt nya digitala skärmar.

Den som redan nu vill se hur de nya tågen kommer att se ut kan ta en titt på VR-filmen nedan. Filmen, som har tagits fram av Rayvr och SJ Labs, tar dig med genom 2 klass, via bistron och vidare till 1 klass.

VägvisARen gör ditt resande lättare

Skärmbild på VägvisARen
Test av funktionen VägvisARen i SJ-appen

Med hjälp av VägvisARen kan användaren hitta rätt på tågstationer genom att följa instruktioner som visas på skärmen samtidigt som kameran visar omgivningen. Den använder Augmented Reality, eller AR-teknik, för att guida dig på t ex Stockholm Central till pendeltåget eller till ditt nästa tåg. Från och med april 2018 kan man testa VägvisARen i appen SJ Labs på Stockholms Centralstation och från juni på sträckorna Stockholm C – Stockholms södra / Flemingsberg, Stockholms södra – Stockholm C samt Flemingsberg – Stockholm C.

Via gröna prickar visar vägvisAren i mobiltelefonen var du ska gå. Foto: Jörgen Appelgren

Vad kommer folk ha på sig i framtiden?

En ny våg av innovation driver en radikal förändring av mode och textilbranschen. I framtiden kan kläder vara datorer, tillverkade med material designade och odlade i ett labb.

Filmen nedan ger en inblick i det som har kommit att kallas Fashiontech.

Kopiera nedanstående text, klistra in den i din loggbok och läs sedan texten.

Bärbar teknik, data, automatisering och labbodlat material kommer att ha en stor inverkan på vad människor kommer att ha på sig i framtiden.

Sedan sömnaden och vävningen föddes har tekniken alltid lett till utveckling inom mode. Den industriella revolutionen mekaniserade tillverkning som möjliggör massproduktion. På 1960-talet tog syntetiska material som polyester fart och skapade nya möjligheter för mode.

Nu öppnar konvergensen av ny teknik upp tidigare otänkbara möjligheter.
Dr Amanda Parkes är modevetenskapsman och chef för innovation vid FT-labs, ett riskkapitalföretag som främst investerar i modetekniska startups. Hon berättar att det bland dessa nystartade företag handlar om att hitta nästa generation förnybara material som kan odlas i ett labb. Traditionell siden produceras av insektslarver som bildar kokonger, oftast silkesmaskar. Men snarare än att lita på dessa insekter, så skapar bulttrådar silke i provrör. Biotillverkade material tar bort behovet av djur och insekter och det är ett mer hållbart och effektivt sätt att producera råmaterial.

Andra företag skapar läderalternativ. I stället för att använda djur skapar forskare biotillverkade material från ananasblad och till och med svamp. Konvergensen mellan mode och teknik ger också möjligheter att förändra inte bara kläder utan de människor som bär dem.

Myant är ett företag som är banbrytande i skapandet av kläder som kan övervaka alla dina rörelser. Så kallade smarta tyger förutspås bli nästa stora genombrott för bärbar teknik. Garn kombineras med elektroniska sensorer så att viktiga data kan fångas från människokroppen. För att skapa kläder som kan övervaka bärarens hälsa och fitness har Myant samlat team av människor som inte traditionellt har arbetat under samma tak. Smarta tyger kan radikalt förändra konsumenternas relationer till kläderna de bär, men när tekniken ökar förändringstakten, hur kan branschen hålla reda på vad konsumenterna verkligen vill ha?

Francesca Muston är chef för detaljhandeln på WGSN, världens ledande modeprognosbyrå. Personalen här använder big data för att analysera politiska, sociala och miljömässiga trender för att förutsäga morgondagens heta mode. Teknik driver en explosion i konsumentens val såväl som det förvirrande utbudet av kläddesign och skapande. För att textil- och modebranschen ska överleva vänder de sig till tekniken. Maskininlärningsteknologier är nu centrala för modeprognoser, vilket snabbt upptäcker mönster bland den ständigt växande datamängden.

Från bioteknik till demografiska förändringar och att förutsäga trender är inte längre en konst, det har blivit en vetenskap.

The Science of Great UI

I följande filmklipp (The Science of Great UI) kan du lära dig de viktigaste tumreglerna för god design när det kommer till UI användargränssnitt.
Små ändringar kan få en stor effekt på resultatet av vad du skapar.

The Science of Great UI av Mark Miller